Work order templates define the layout and fields used when adding new work orders.
Prerequisites
Before creating a work order template, ensure the following:
- At least one work order type, workflow, and relevant fields have been configured in Tools
Steps to Create a Template
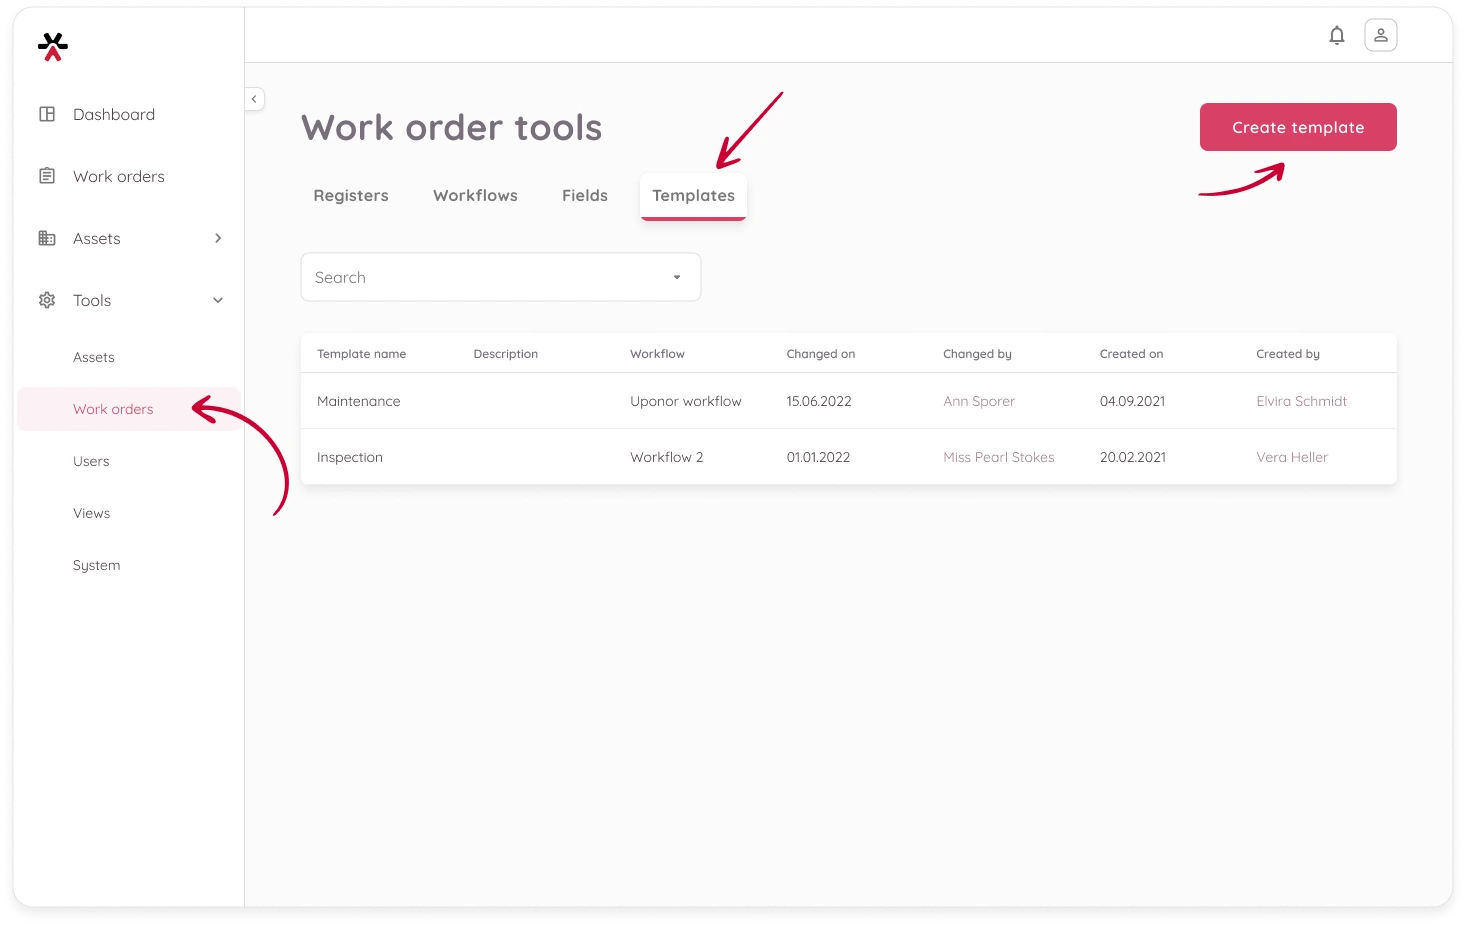
- Go to Tools > Work orders > Templates
- Click Create template in the top-right corner
Step 1: Provide the General Information
- Template name – Give the template a clear, descriptive name.
- Description (optional) – Briefly explain how or when this template should be used.
- Work order type – Select one or more work order types that this template applies to.
- Workflow – Choose a single workflow to associate with this template. This defines the steps the work order will follow once created.
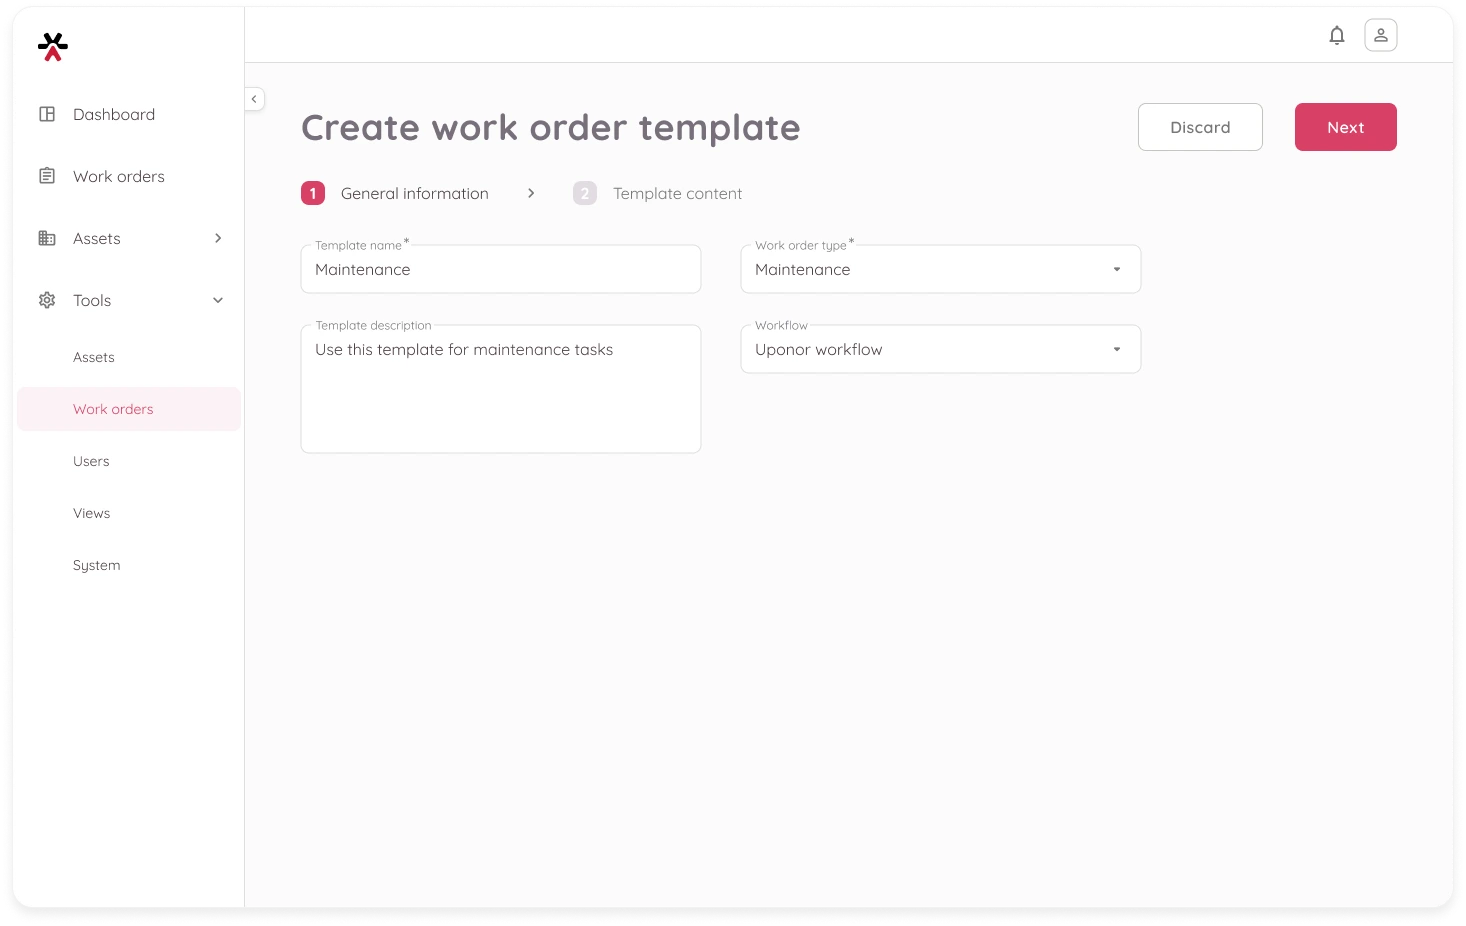
Click Next to continue.
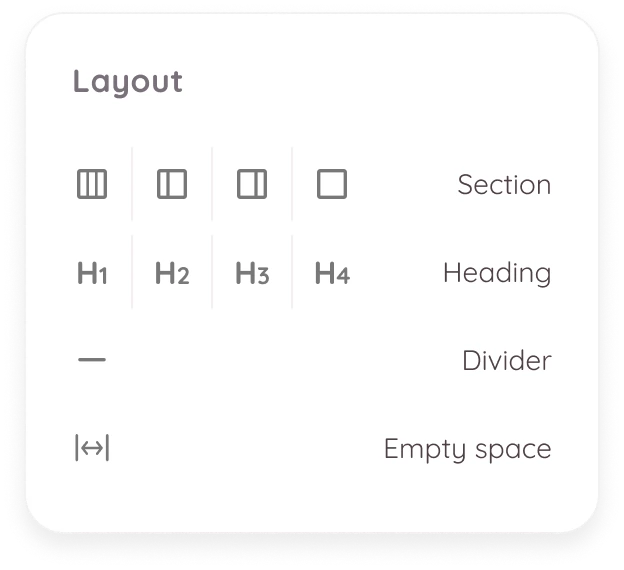
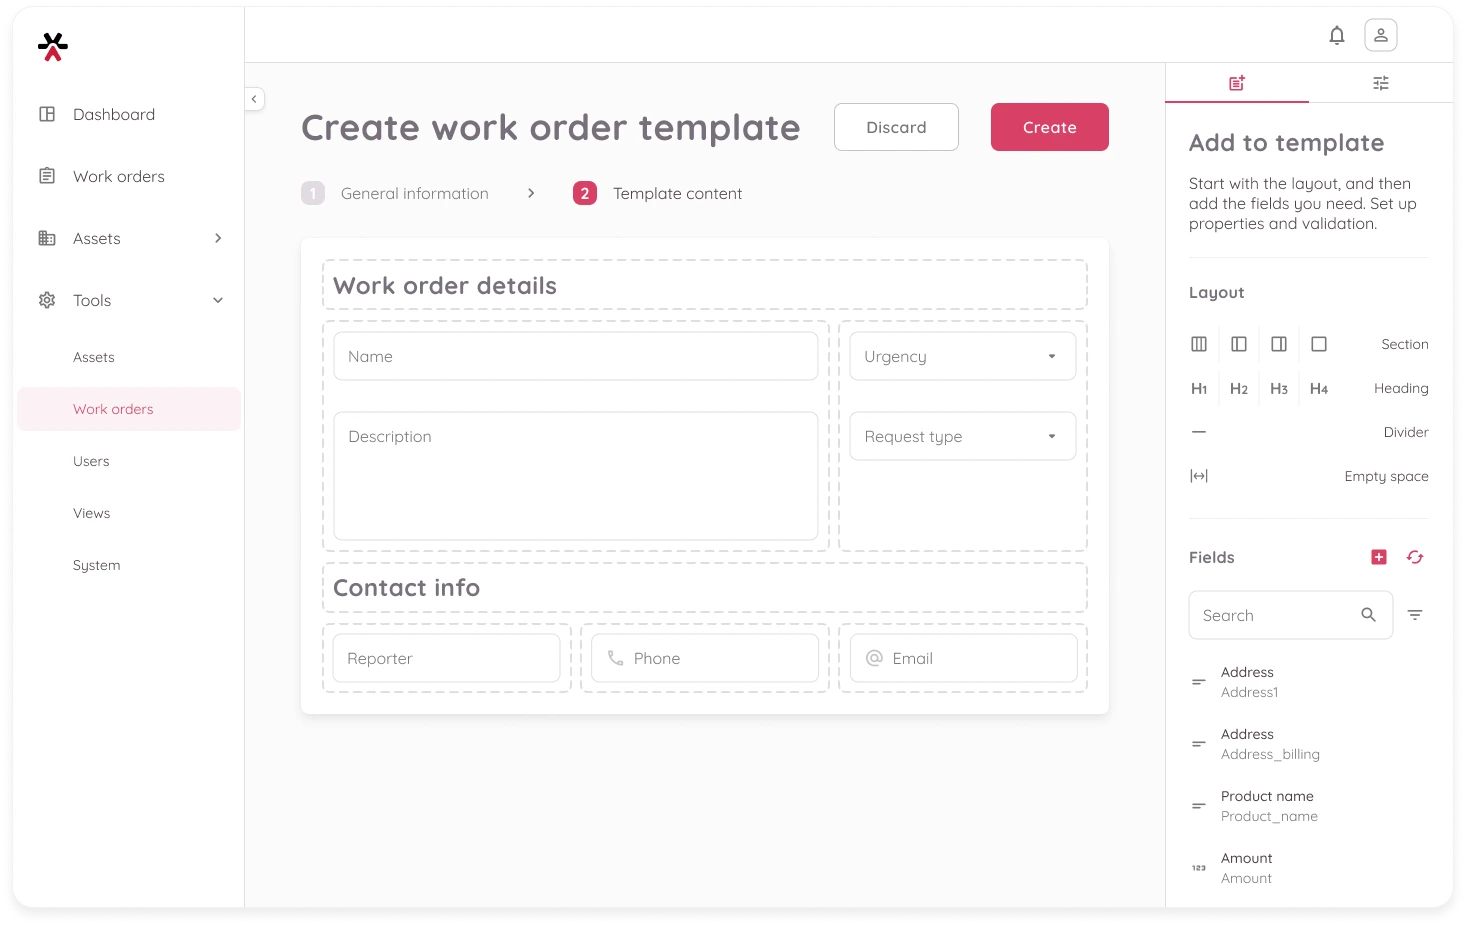
Step 2: Add Layout Elements
Define template content. Use the panel on the right to drag and drop elements into the template grid.
Begin by adding sections. These act as containers for your content and determine the structure of the template. ⚠️ You must add at least one section before you can place any other elements.
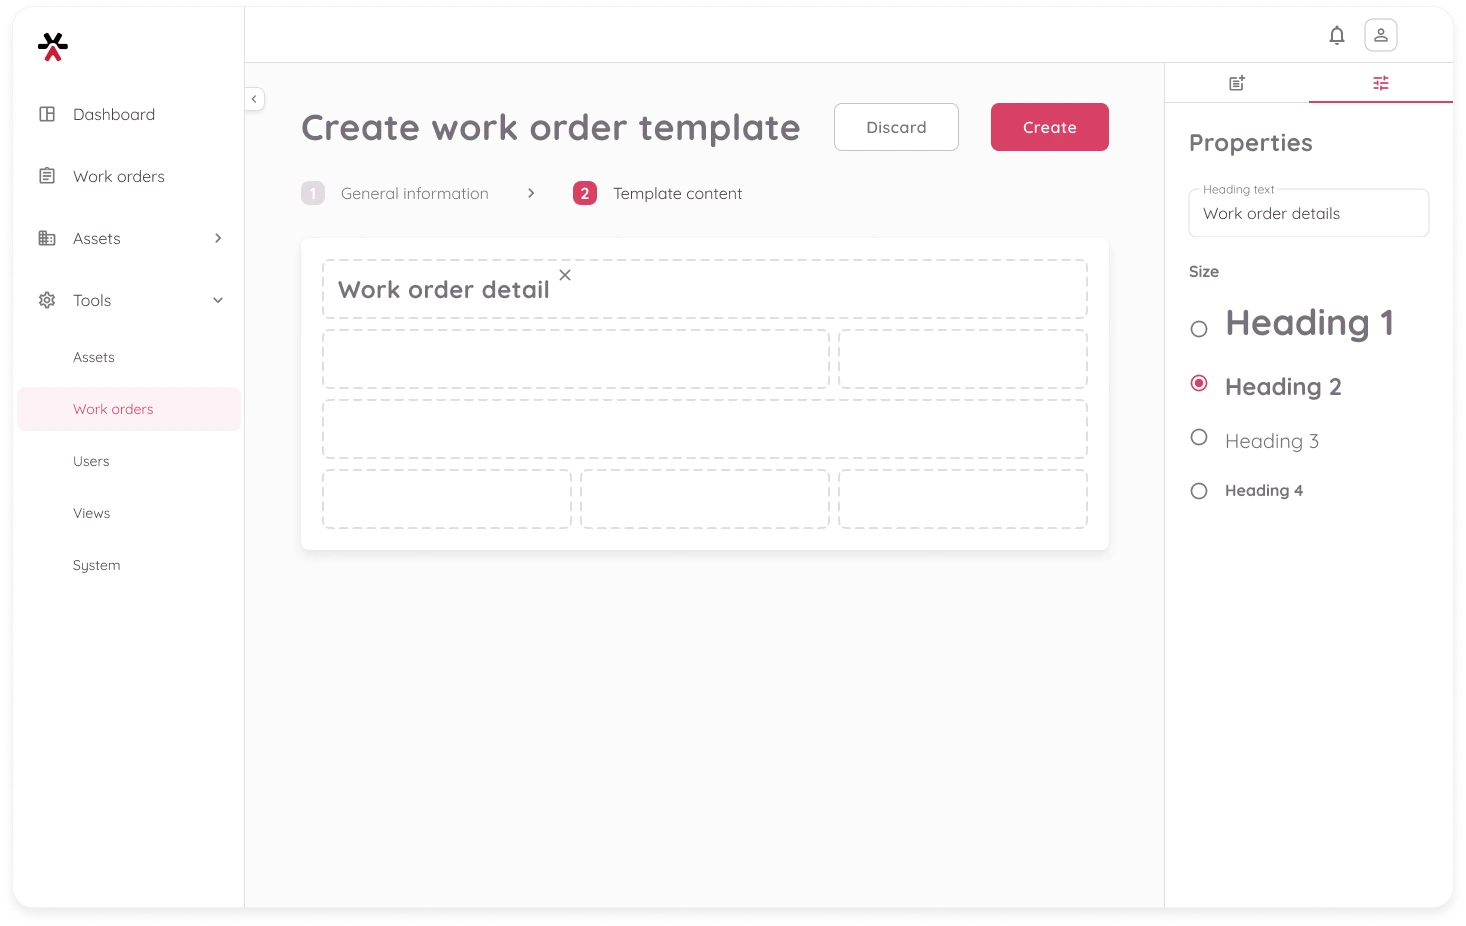
- Headings – Use headings inside sections to label parts of your template.
- To edit the heading text, click the header in the template and use the right-hand panel to update its content.
- Divider – Add horizontal lines to visually separate content.
- Empty space – Use spacers for layout balance and readability.
Step 3: Add Fields
Once your layout is structured with sections, use the Fields tab to add fields inside the sections.
- You can filter fields by type or search by name.
- Each field can be used only once per template.
If a needed field is missing:
- Click the ➕ icon to create a new field.
- Then click the 🔄 refresh icon to update the list.
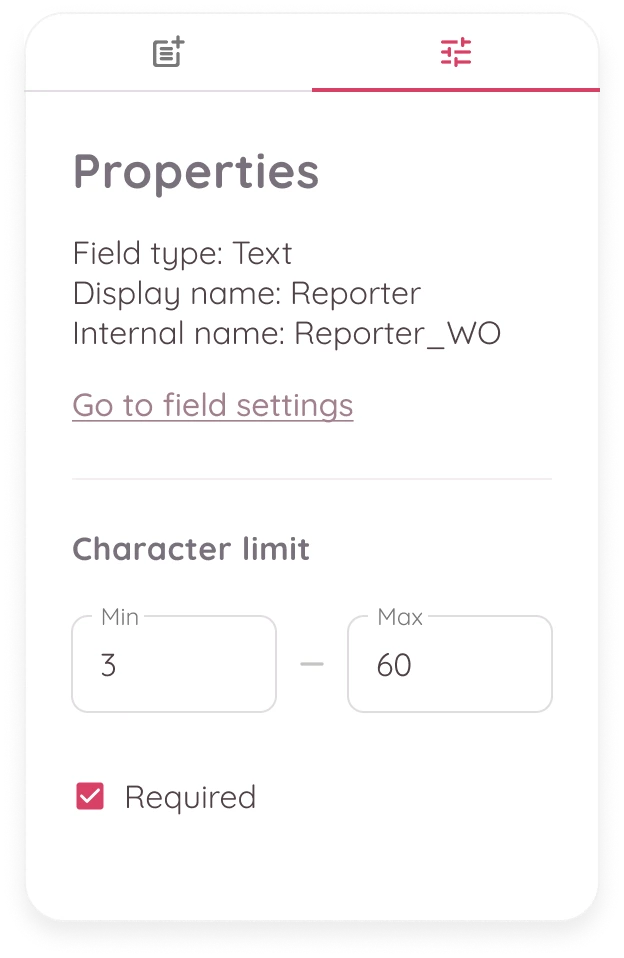
Some field types have optional properties you can configure.
Select a field in the template, then use the panel on the right to set the following:
- Required – Makes the field mandatory for assets using this template.
- Character limit – For text fields; define minimum and maximum character count.
- Value limit – For numeric fields; set minimum and maximum values.
- Decimal places – For decimal fields only; specify the number of digits after the decimal point.
To remove any field or layout element, select it and click the Delete icon in the top-right corner of the element.
Once all information is filled out, click Create to save the template. You will be redirected back to the list where the new template will now appear.
What Happens Next?
After creating a template, you can:
- Use it when creating new work orders
- Assign it to new or existing work order types
- Update the template as your needs evolve