Fields specify the content of your templates and can be reused across multiple templates. They help collect and organise data for Assets, Work Orders and Users. While you need to create separate field sets for each, the process for creating them is the same.
How to Create a Field
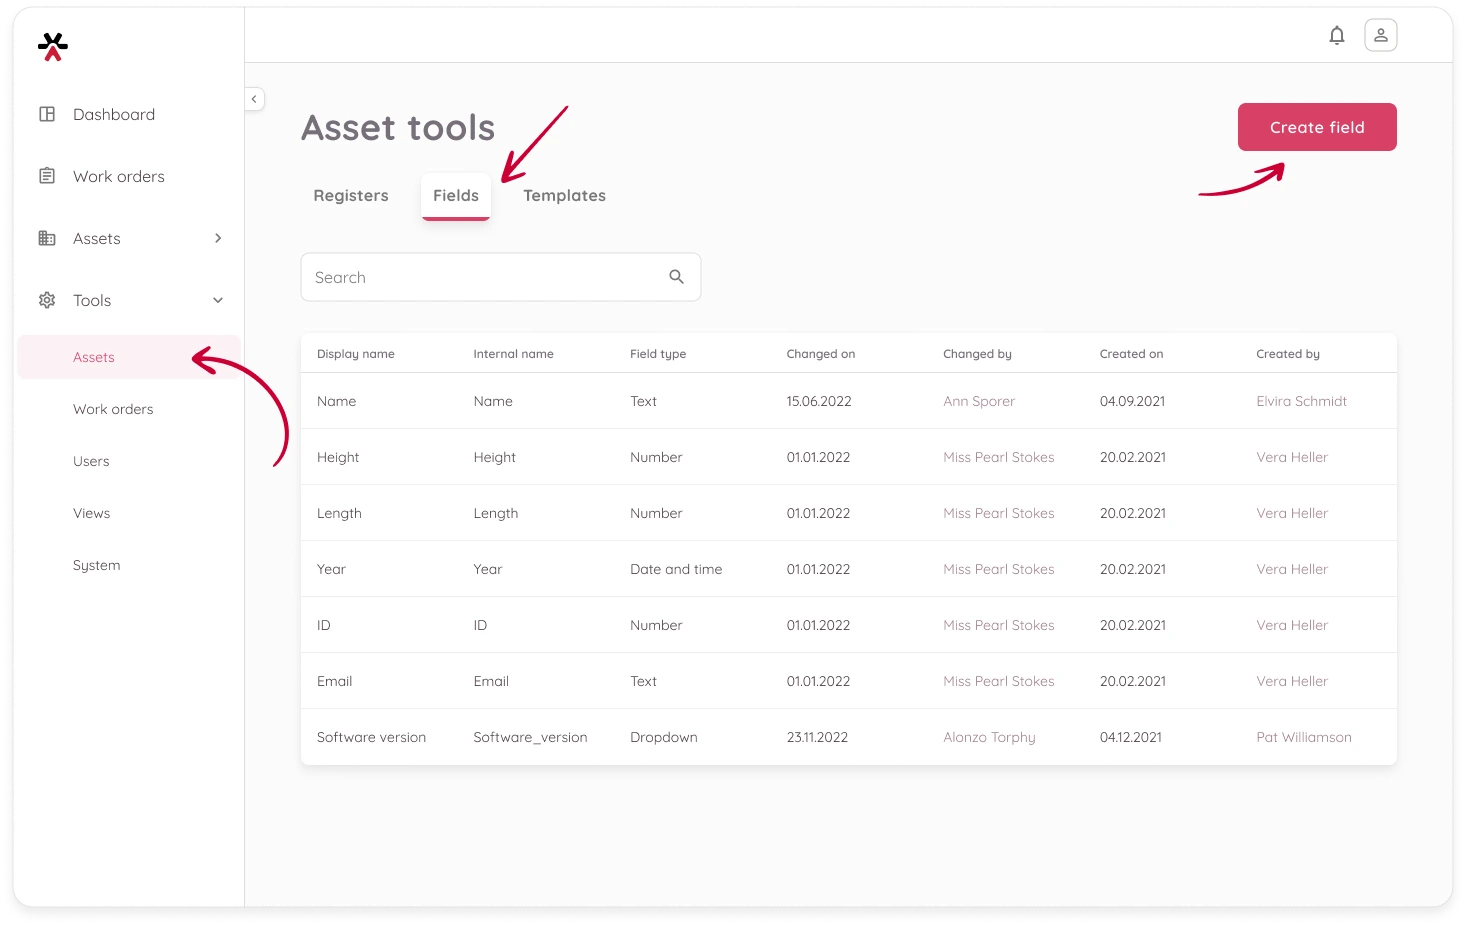
- Go to Tools > Assets > Fields or Tools > Work orders > Fields or Tools > Users > Fields
- ⚠️ Fields for Assets, Work Orders, and Users must be defined separately — they can’t be reused across different modules.
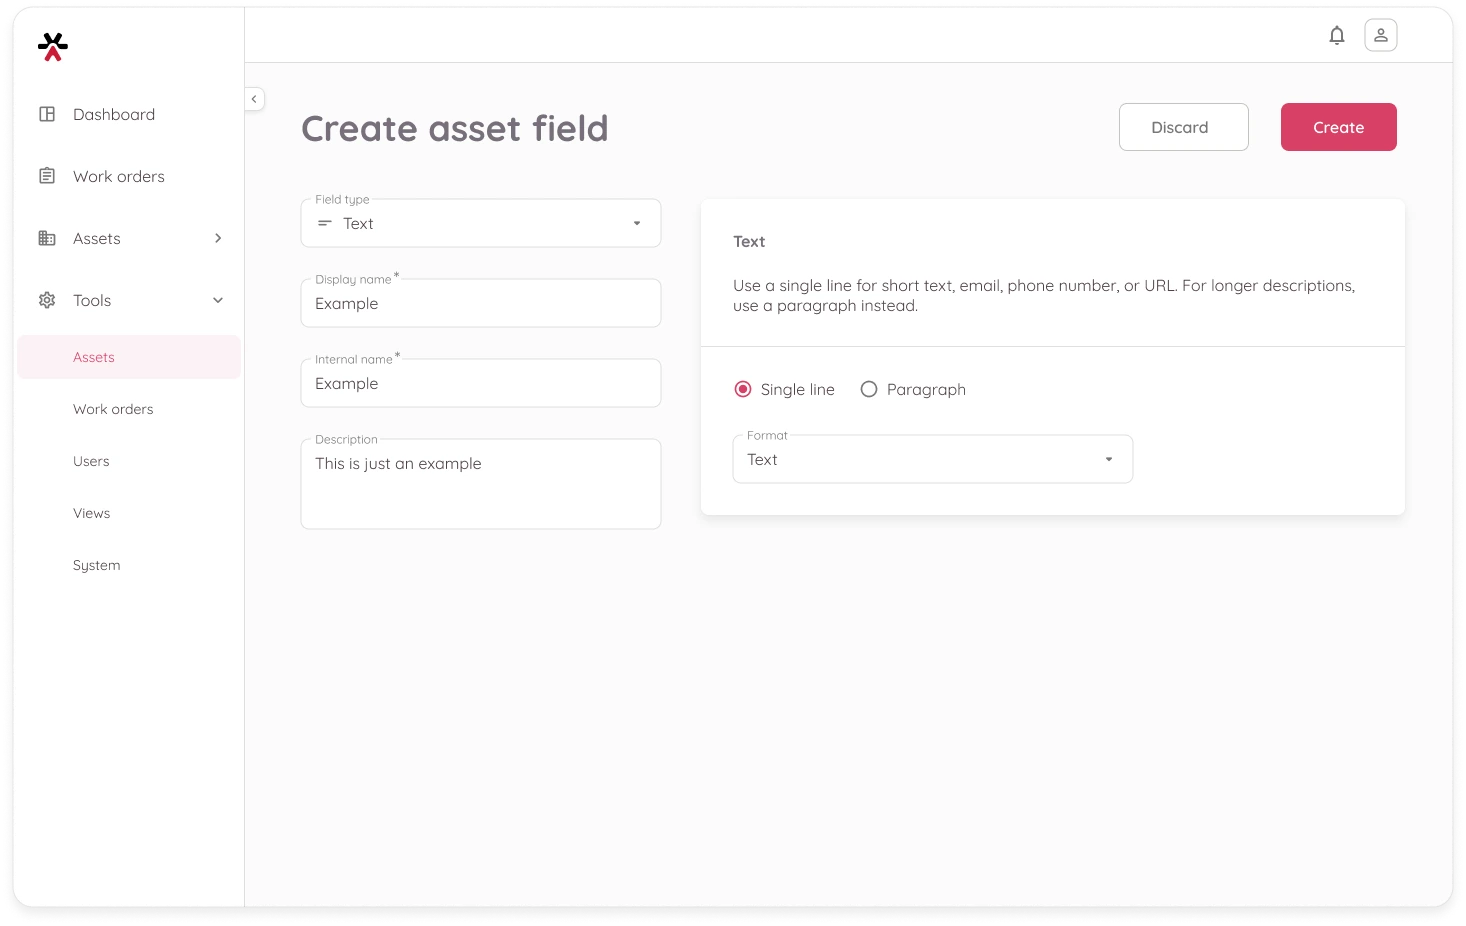
- Click Create field in the top right corner.
- Choose a Field type from the dropdown.
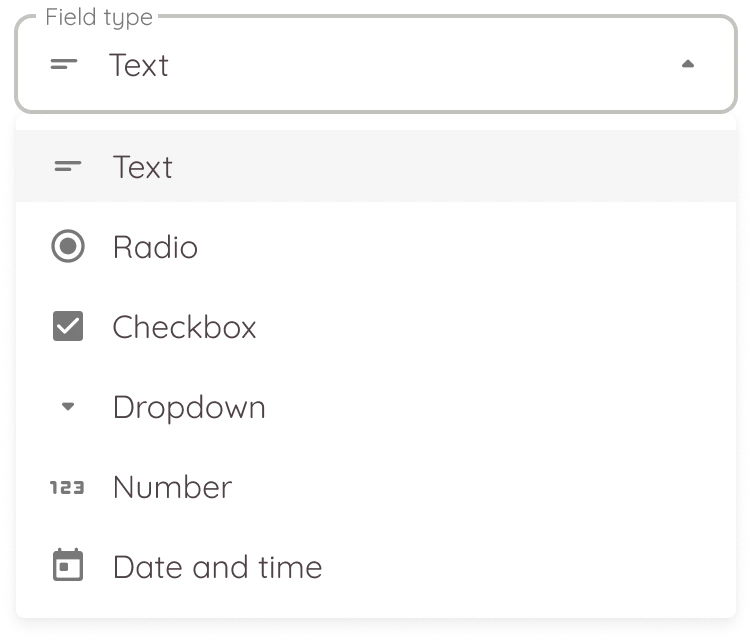
- Fill in the required details and specify options if any. Common inputs for all field types:
- Display name: Visible field name
- Internal name: Unique identifier for the system
- Description (optional): Additional context or guidance
- Click Create to save.
Field Types and Parameters
Some field types have their own configurable options.
Text
Used for short or long freeform input – like names, notes, or contact details.
Parameters:
- Single line
- Paragraph (for longer text)
Format (for Single line only):
- Plain text
- Email – displays an email icon and applies email format validation.
- Phone number – displays a phone icon and accepts only numeric input.
- URL – displays a URL icon and applies URL format validation.

Additional parameters like character limits can be configured within each template.
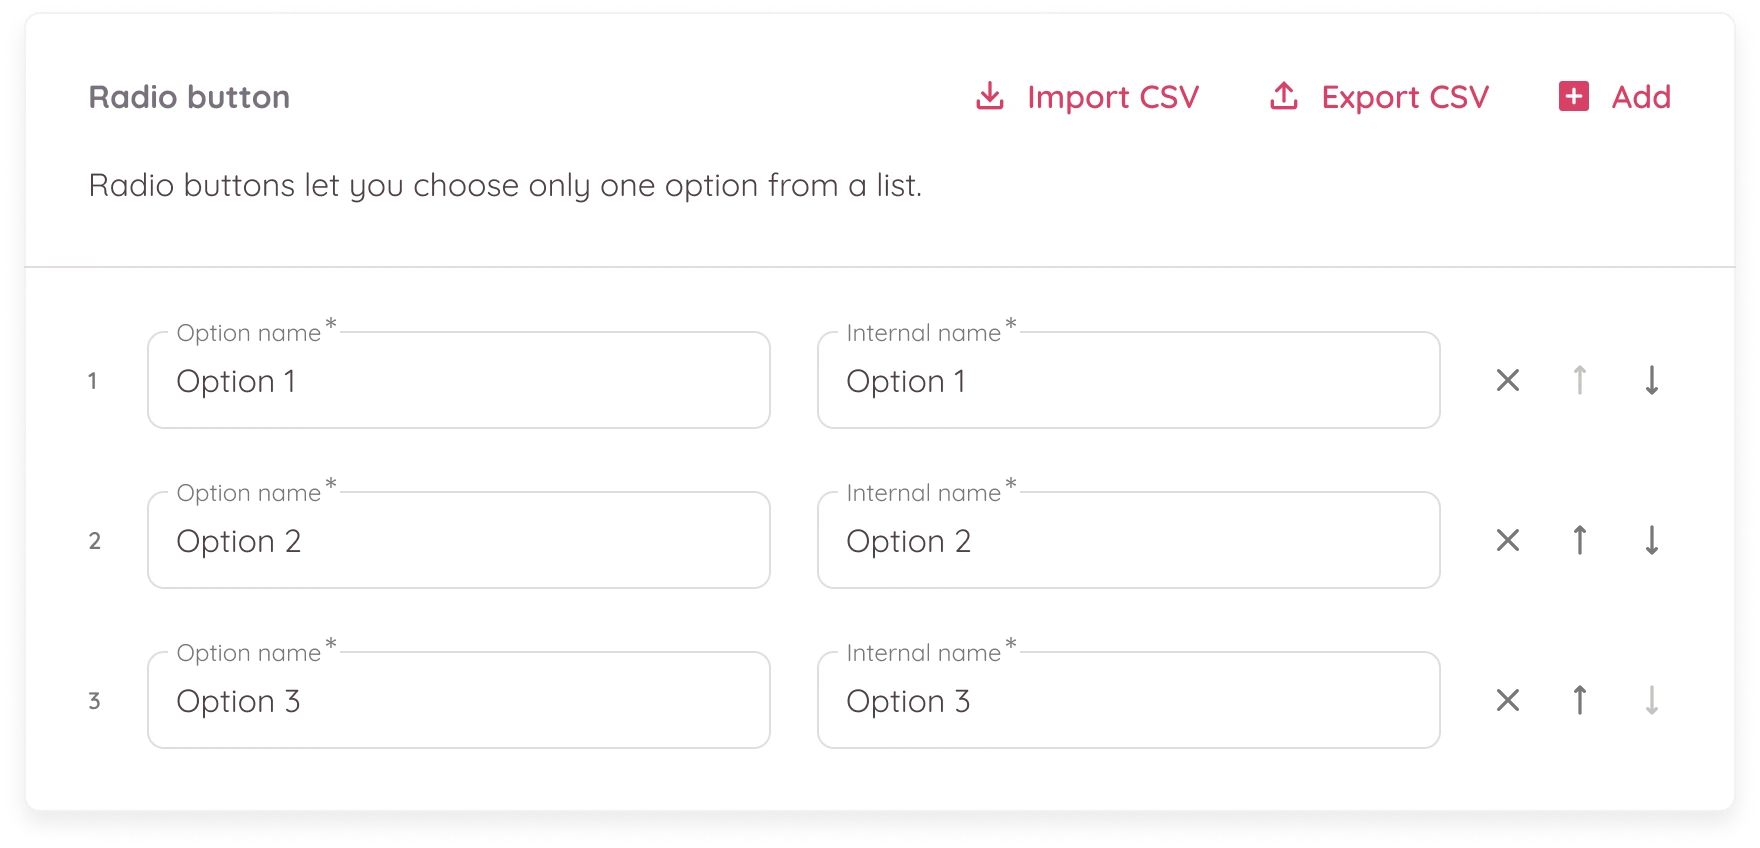
Radio Button
Allows users to select one option from a predefined list. You can manually enter options, reorder them, or import from a CSV file. A radio button field must have at least two options.
Checkbox
Used for binary yes/no inputs or selecting multiple values. Best suited for small sets of options. You can manually enter options, reorder them, or import from a CSV file.

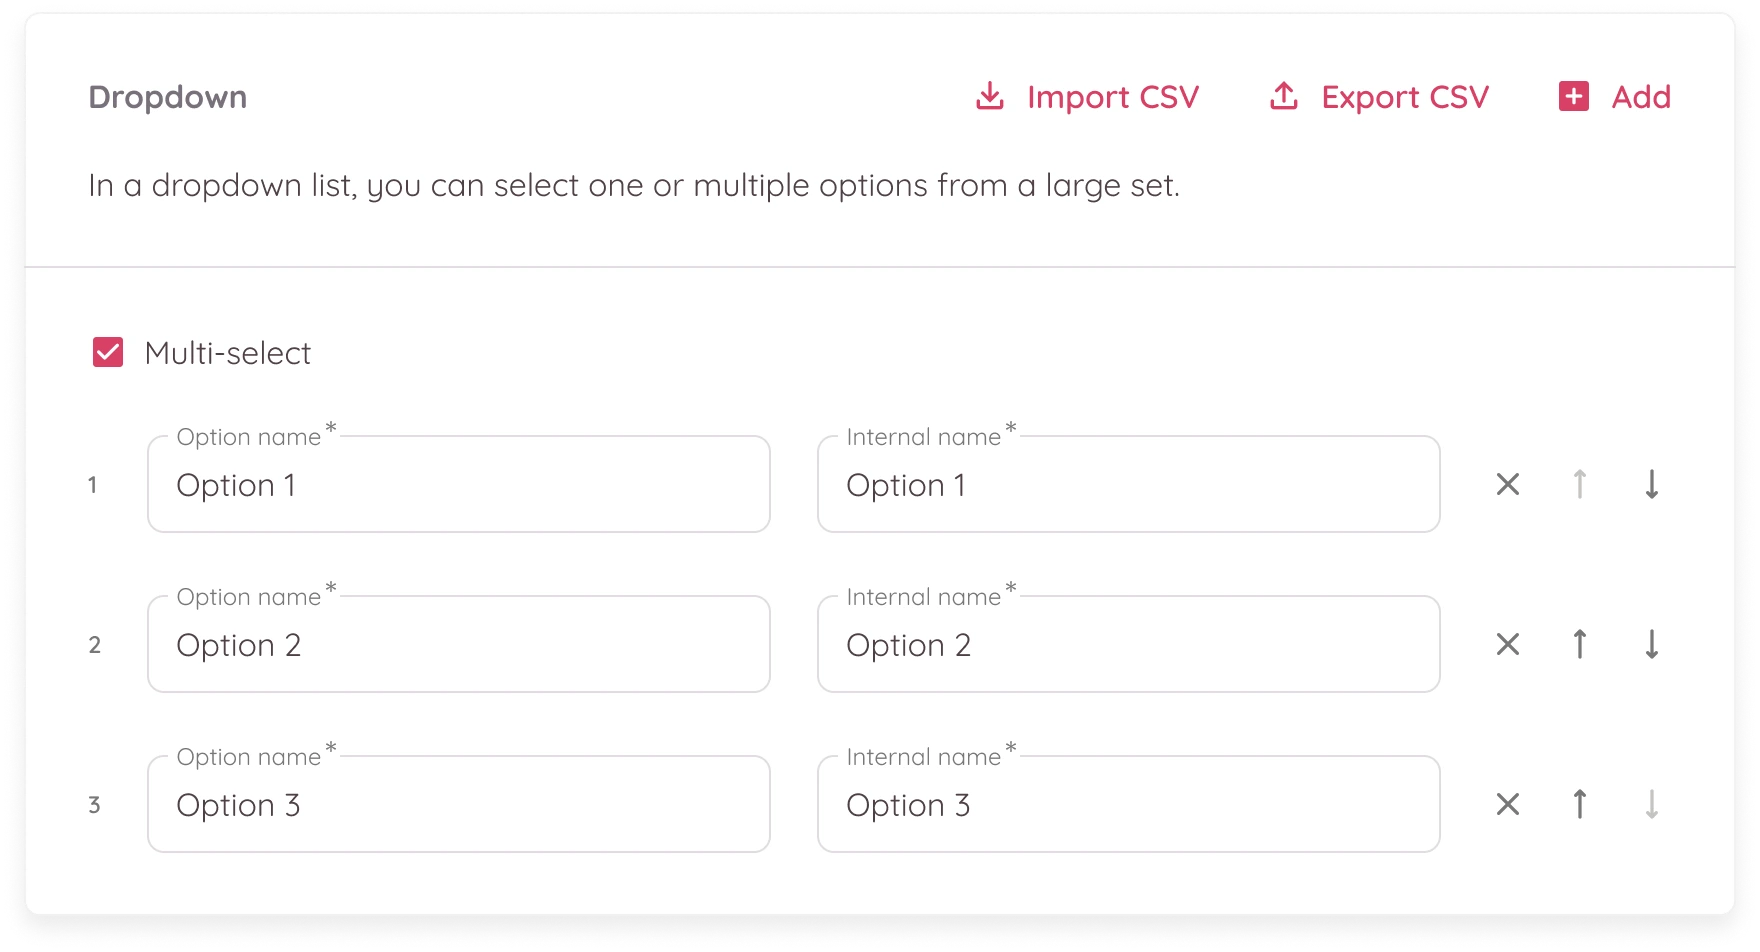
Dropdown
Provides a list for selecting one or multiple options from a larger set. You can manually enter options, reorder them, or import from a CSV file. A dropdown field must have at least two options.
Number
Accepts only numeric input.
Parameters:
- Integer
- Decimal
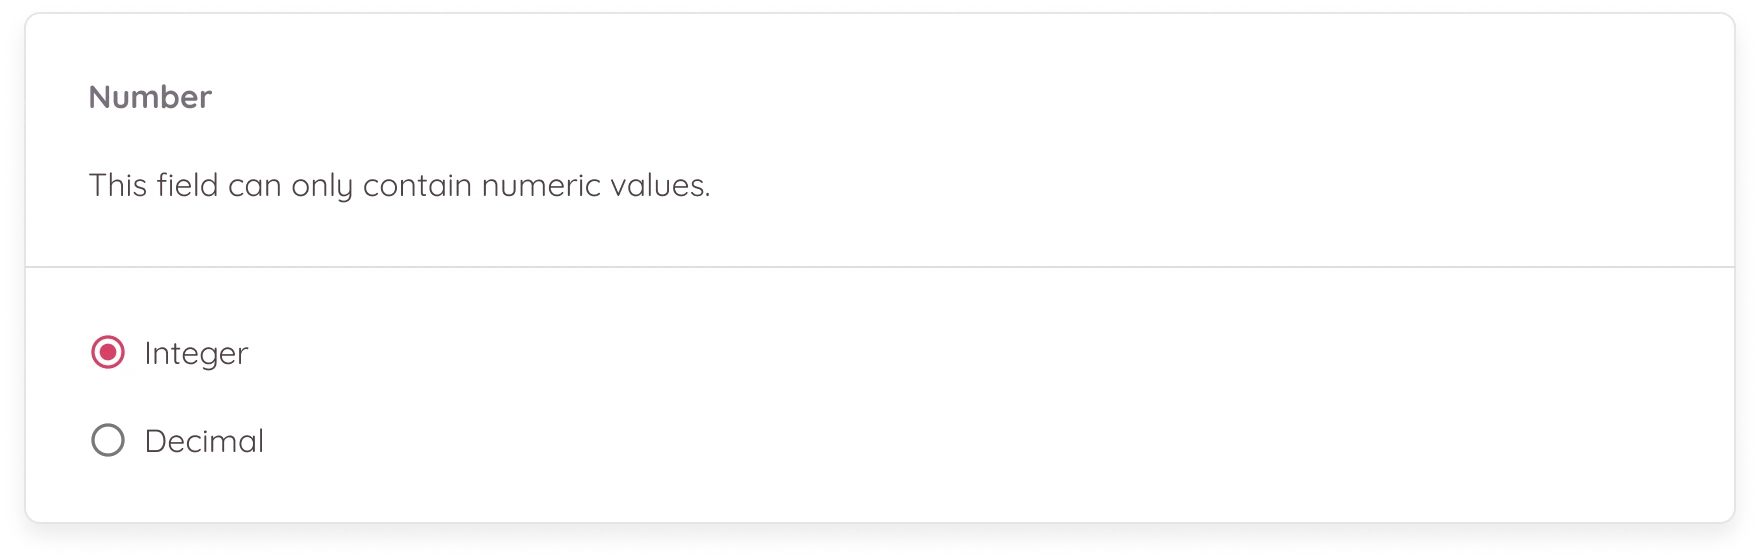
Additional parameters like value limits and decimal precision can be configured within each template.
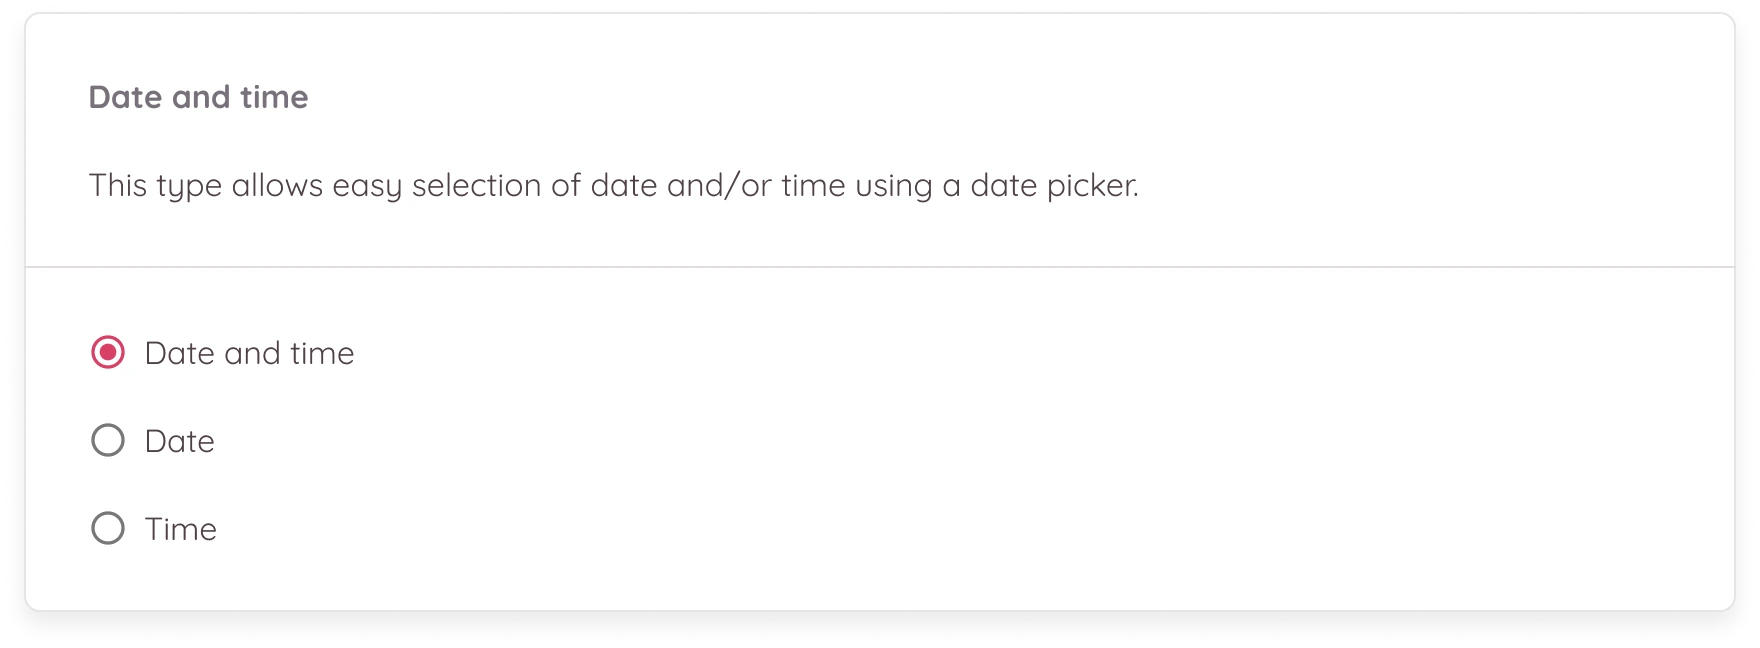
Date and Time
Captures a date, time, or both.
Parameters:
- Date and time
- Date only
- Time only
How to Edit a Field
You can edit existing fields, however, some core attributes are locked after creation to ensure data consistency.
- Go to Tools > Assets > Fields or Tools > Work orders > Fields or Tools > Users > Fields
- Click on the field in the table to open the edit mode
- Make the necessary updates
- Click Save to confirm changes
What Can Be Edited
- Display name
- Description
- Options: For field types like dropdown, checkbox, or radio button, you can add new options or rename existing ones
What Cannot Be Edited
- Field type
- Internal name
- Field-specific parameters (e.g. single line vs paragraph for text fields)
To change a locked attribute, you’ll need to delete the field and create a new one.
…Delete field
…Special fields